Ever spent four hours sculpting a silicone forehead ridge… only to have it peel off mid-scene because you used spirit gum meant for lace wigs? Yeah. We’ve been there. (RIP, goblin audition.)
If you’re diving into the world of costume makeup—especially prosthetic makeup effects—you’re not just painting skin. You’re engineering illusion. And while TikTok tutorials make it look like 30 seconds of rubbing “FX gel” creates movie magic, real prosthetic work demands precision, patience, and products that won’t betray you under hot lights.
In this guide, we’ll break down exactly how to design, apply, and finish professional-grade prosthetic makeup effects—from foam latex scars to full silicone aging appliances—based on over a decade in film, theatre, and special FX labs. You’ll learn the materials that actually last, the application sins that cause delamination, and why your foundation choice can ruin even the best-sculpted nose.
Table of Contents
- Why Prosthetic Makeup Effects Matter (Beyond Halloween)
- Step-by-Step: Applying Prosthetic Makeup Like a Studio Artist
- 7 Best Practices for Skin-Blending Realism
- Real-World Case Studies: From Indie Film to Broadway
- FAQs About Prosthetic Makeup Effects
Key Takeaways
- Prosthetic makeup effects rely on material compatibility—silicone on silicone, alcohol-activated paints on platinum silicone, etc.
- Adhesion failure is usually due to improper skin prep or mismatched adhesive chemistry—not “cheap” prosthetics.
- Realism comes from texture blending, edge softening, and colour layering—not just the appliance itself.
- Film/TV pros avoid liquid latex for facial prosthetics—it shrinks, cracks, and isn’t breathable enough for long shoots.
- Always do a 24-hour patch test with adhesives; MMA-based removers can cause chemical burns if misused.
Why Do Prosthetic Makeup Effects Matter (Beyond Just Looking Scary)?
Prosthetic makeup isn’t just for haunted houses or cosplay cons. In film alone, the global special effects makeup market hit $4.8 billion in 2023 (Statista, 2024)—driven by demand for practical effects that CGI can’t replicate emotionally. Think of Doug Jones in The Shape of Water or the subtle aging in The Irishman: audiences connect with tactile, human-looking transformations.
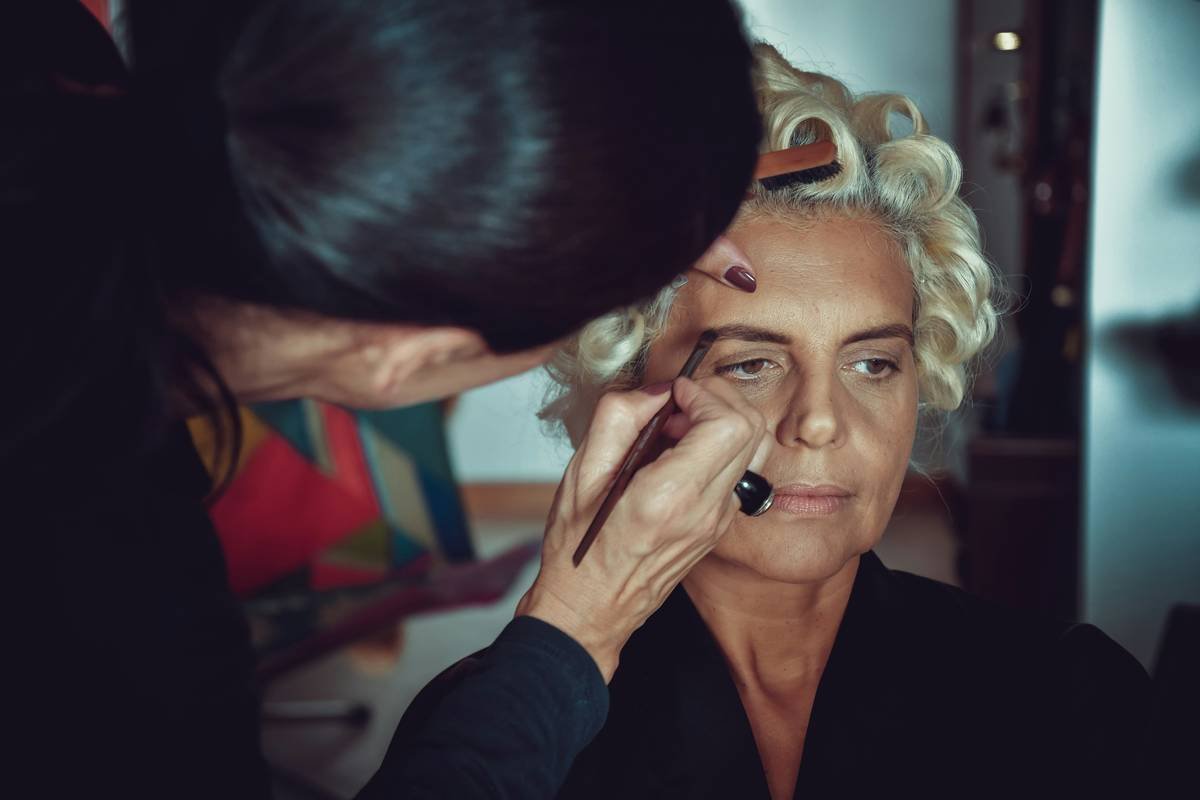
But here’s the brutal truth: most beginners underestimate the science behind the art. I once watched a talented student lose an entire jawpiece during a stage performance because they applied it over moisturized skin. No primer. No degreaser. Just hope and spirit gum. Spoiler: hope doesn’t adhere.
Different prosthetic materials behave radically differently:
- Foam latex: Lightweight, flexible, but degrades in humidity (common in theatre).
- Gelatin: Cheap and easy to cast, but melts above 90°F—great for student films, terrible for summer cons.
- Platinum-cure silicone: The gold standard for film—hyper-realistic, durable, but expensive ($40–$100 per small appliance).
- Collodion: Used for scarring effects directly on skin, not pre-made pieces.
Step-by-Step: Applying Prosthetic Makeup Like a Studio Artist
How do I prep my skin before applying a prosthetic piece?
Optimist You: “Clean skin = happy adhesion!”
Grumpy You: “Ugh, fine—but only if coffee’s involved.”
Wash face with an oil-free cleanser (Cetaphil works). Then swipe with 99% isopropyl alcohol or a professional degreaser like Ben Nye Final Seal. Let dry completely. Any residue = adhesion betrayal.
Which adhesive should I actually use?
Match adhesive to your prosthetic material:
- Silicone pieces: Use medical-grade silicone adhesives (e.g., Telesis 5 or Skin Tite).
- Foam latex: Pros-Aide or Beta Bond—flexible when dry, water-resistant.
- Avoid: Spirit gum on silicone—it won’t bond. Ever.
How do I blend the edges without making them obvious?
Thin the edges with a scalpel (not scissors—they crush fibers). Then use a stipple sponge with a mix of Pros-Aide and matching foundation to “feather” the seam into skin. Set with translucent powder to kill shine.
What paints won’t crack or slide off?
Never use regular makeup over silicone. It beads up like water on wax paper. Instead:
- Alcohol-activated paints (e.g., Skin Illustrator): Dry fast, stay flexible.
- Geoffrey’s Palette: Oil-based but formulated for FX—blendable and durable.
- Seal everything with a matte fixer like Blue Marble or Ben Nye Final Seal.
7 Best Practices for Skin-Blending Realism (That No One Talks About)
- Match undertones, not just surface colour. A prosthetic might be “beige,” but if your skin has pink or olive undertones, blend accordingly.
- Add pores and texture. Drag a stipple sponge with thinned paint across the appliance to mimic skin microtexture.
- Vein it out. Use a fine liner brush and blue-grey paint to add subtle veins near temples or hands.
- Don’t forget movement. Test your piece while smiling, frowning, and talking—edges should stretch, not lift.
- Control shine strategically. Matte the forehead but leave a hint of sheen on the nose—just like real skin.
- Layer colours. Real skin isn’t flat—use reds in creases, yellows on high points, purples in shadows.
- Set, don’t cake. Over-powdering creates a chalky mask. Light dusting only.
| Terrible Tip to Avoid | Why It’s Bad |
|---|---|
| “Just use liquid latex as adhesive!” | Liquid latex shrinks as it dries, pulling edges away from skin. It also traps heat and moisture—hello, rash city. |
Real-World Case Studies: When Prosthetic Makeup Effects Made or Broke a Project
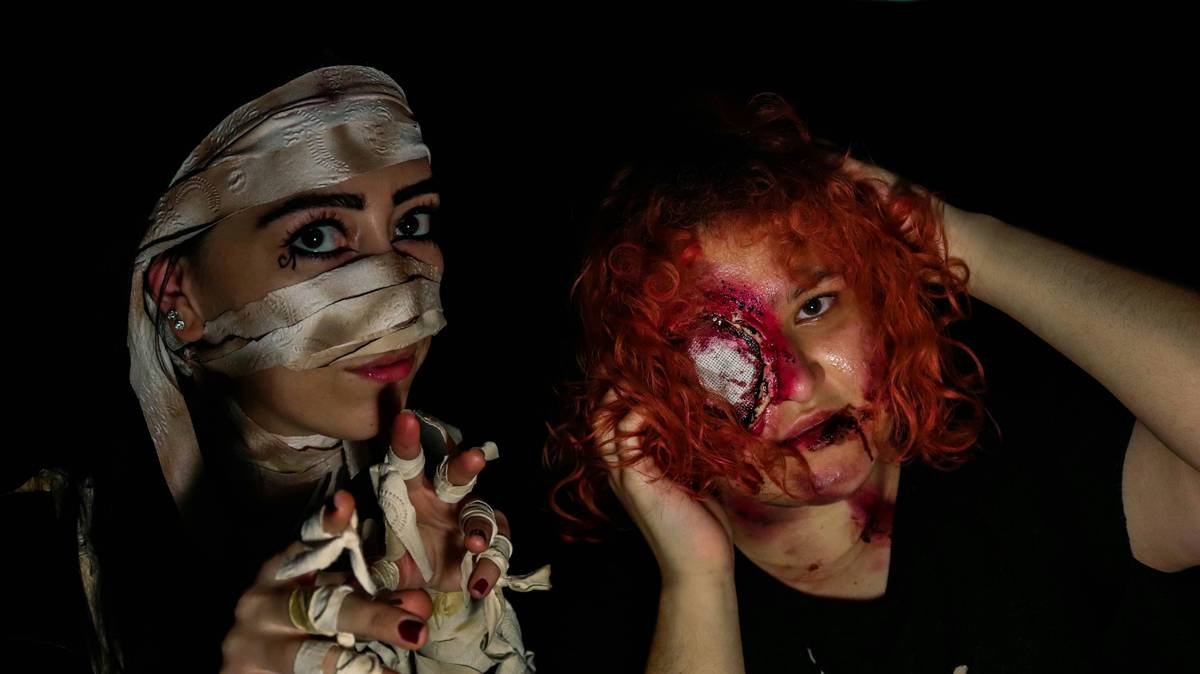
Case Study 1: Indie Horror Short “The Hollow” (2022)
Budget: $8K. Challenge: Create a decaying corpse with visible ribcage protrusion. Solution: Used hand-sculpted platinum silicone appliances with internal armature for structure. Applied with Telesis 5, painted with Skin Illustrator, sealed with Mehron Barrier Spray. Result: Won Best Practical Effects at Screamfest—and no pieces lifted during 12-hour night shoots.
Case Study 2: Community Theatre “Phantom of the Opera” (2023)
Challenge: Daily wear for 6 weeks. Needed lightweight, reusable pieces. Used foam latex masks with Pros-Aide. Key insight: Actors washed pieces nightly with Johnson & Johnson Baby Shampoo (gentle, non-oily), stored flat between parchment paper. Zero replacements needed.
FAQs About Prosthetic Makeup Effects
How long do prosthetic makeup effects last?
Film-grade silicone: 8–12 hours with proper prep. Foam latex: 4–6 hours (less in humid conditions). Always carry adhesive and paint for touch-ups.
Can I reuse prosthetic pieces?
Yes—if cleaned properly. Rinse with cool water, gently wash with mild soap, air-dry away from sunlight. Store flat in acid-free tissue paper. Never fold.
Are prosthetic makeup effects safe for sensitive skin?
Patch-test all adhesives and removers 24 hours before use. Avoid MMA-based removers—they’re harsh. Opt for isopropyl myristate or Ben Nye Bond Off for safer removal.
Do I need a license to do prosthetic makeup professionally?
Not federally in the U.S., but many states require cosmetology or theatrical makeup certification for paid work. Check local regulations.
Conclusion
Prosthetic makeup effects aren’t just about sticking on a rubber nose and calling it a day. They’re a blend of sculpture, chemistry, and performance art—all resting on millimeters of adhesive. But when done right? You don’t just create a character. You vanish into one.
Remember: material compatibility, edge blending, and dynamic colour layering separate Halloween hacks from Hollywood heroes. Prep like a pro, paint with purpose, and never skip the patch test.
Now go make something gloriously grotesque—or beautifully aged. Your audience won’t see the glue. They’ll only see the truth you built.
Like a 2000s flip phone, great prosthetic makeup snaps into place—and lasts all night.