Ever spent hours sculpting a flawless alien creature… only to have your silicone prosthetic tear during the first casting? Yeah. That gut-punch—followed by the acrid smell of wasted platinum-cure silicone and the sound of your wallet whimpering—is one I know too well.
If you’re diving into casting prosthetic makeup, you’re not just dabbling in face paint—you’re engineering wearable art that bends, breathes, and survives under hot stage lights (or zombie apocalypse cosplay). This guide cuts through the fluff and delivers field-tested techniques used by industry pros—including my own hard-won lessons from failed forehead appliances that peeled off mid-performance like sad banana peels.
You’ll learn: how to choose mold-making materials without blowing your budget, why timing is everything when mixing silicone, how to avoid common adhesion disasters, and real-world workflows from film set veterans. Let’s turn your sculpting clay dreams into durable, expressive reality.
Table of Contents
- Why Casting Prosthetic Makeup Is So Tricky (And Why Most Beginners Fail)
- Step-by-Step: Casting Prosthetic Makeup Like a SFX Veteran
- 7 Non-Negotiable Best Practices for Flawless Casts
- Real-World Wins: From Indie Film to Broadway
- FAQs About Casting Prosthetic Makeup
Key Takeaways
- Casting prosthetic makeup requires precision in mold-making, material selection, and demolding—not just artistic skill.
- Platinum-cure silicone (like Dragon Skin or Ecoflex) is the gold standard for skin-safe, flexible prosthetics.
- A poorly vented mold = trapped air bubbles = ruined cast. Always map airflow before pouring.
- Skin prep and adhesive choice (e.g., Telesis 5 vs. Beta Bond) impact wear time more than most realize.
- Practice with alginate life casts before investing in expensive silicone runs.
Why Casting Prosthetic Makeup Is So Tricky (And Why Most Beginners Fail)
Casting prosthetic makeup isn’t just “pouring goo into a mold.” It’s a fusion of sculpture, chemistry, and dermatology. According to the International Alliance of Theatrical Stage Employees (IATSE), over 60% of rookie special effects makeup artists cite prosthetic casting as their steepest learning curve—often due to irreversible errors in material handling or mold design.
I learned this the hard way. On a low-budget horror short, I used tin-cure silicone to save $40. Big mistake. Tin-cure degrades faster, doesn’t hold fine texture, and—worst of all—released toxic fumes when cured near halogen work lights. My actor broke out in hives. Production halted. Lesson burned into my brain: never compromise on medical-grade, skin-safe materials.
The stakes are real. Poorly cast prosthetics lift at the edges, crack under stress, or irritate skin. And in today’s TikTok-driven world, audiences spot fake-looking seams instantly. Authenticity isn’t optional—it’s expected.
Step-by-Step: Casting Prosthetic Makeup Like a SFX Veteran
What materials do I actually need?
Don’t fall for “starter kits” packed with hobby-grade junk. Invest in:
- Sculpting medium: Chavant NSP clay (non-sulfur, won’t inhibit silicone cure)
- Mold rubber: Polyurethane (for mother mold), Platinum silicone (for casting)
- Casting silicone: Smooth-On Dragon Skin 10 (soft, tear-resistant, FDA-compliant)
- Release agent: Universal Mold Release (never use petroleum jelly—it ruins detail!)
- Adhesive: Telesis 5 or MMF Ultra Hold (medical-grade, breathable)
How do I build a mold that won’t trap air?
Most beginners skip this—and pay dearly. After sculpting your feature (say, a scar or goblin nose), apply a thin layer of silicone over high-detail zones. Then embed fiberglass scrim into subsequent layers for strength. Crucially: carve shallow vent channels along edges and deep crevices using a wax carver. These let air escape as silicone flows in.
Optimist You: “Just pour slowly!”
Grumpy You: “Ugh, fine—but only if coffee’s involved AND you’ve degassed your silicone under vacuum first.”
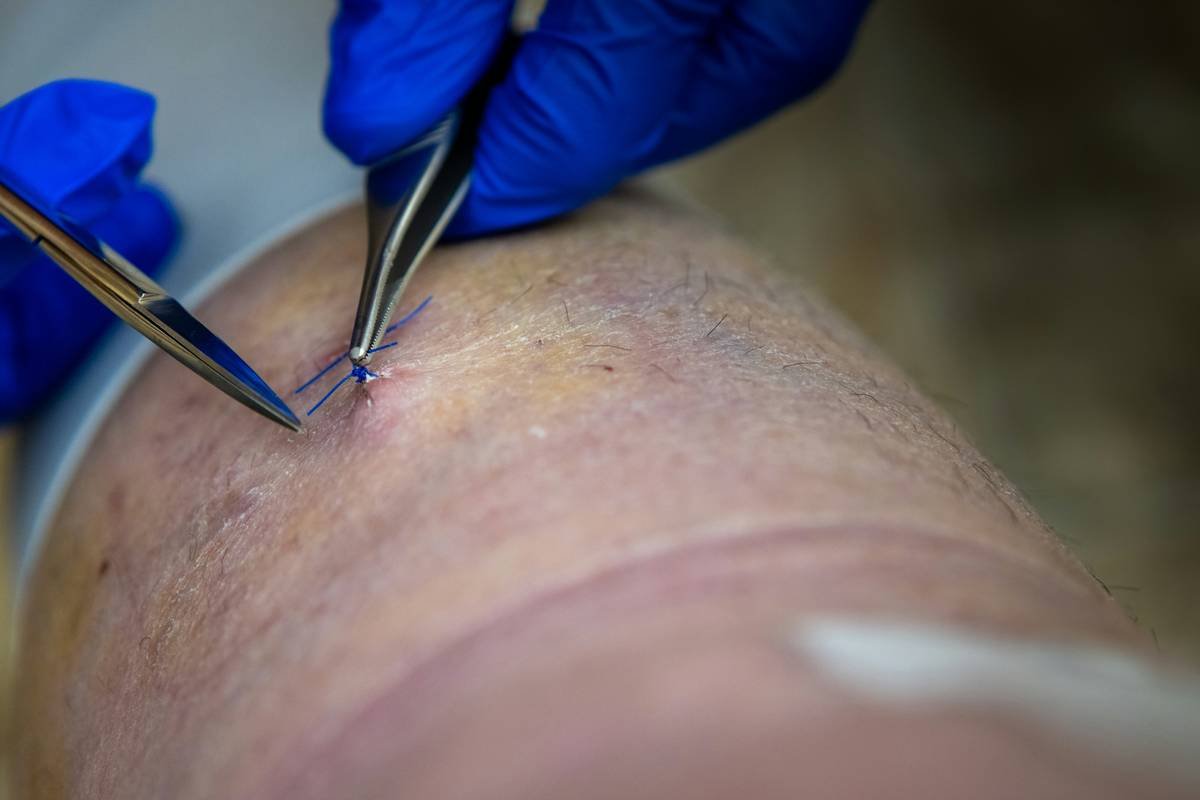
When do I demold without tearing the piece?
Timing depends on your silicone’s pot life and cure time. Dragon Skin 10 cures in ~4 hours at room temp—but rushing it causes micro-tears. Test flexibility at the thinnest edge. If it springs back without whitening, you’re golden.
7 Non-Negotiable Best Practices for Flawless Casts
- Always do a life cast first. Use dental alginate to capture accurate facial topography—your sculpt must match real contours.
- Degas silicone under vacuum. Bubbles = weak spots. A $120 vacuum chamber pays for itself after one rescue.
- Thin edges = better blending. Feather prosthetic borders to 0.3mm thickness using a scalpel post-demold.
- Patch-test adhesives. Not all skin tolerates solvents. Wait 24 hours before full application.
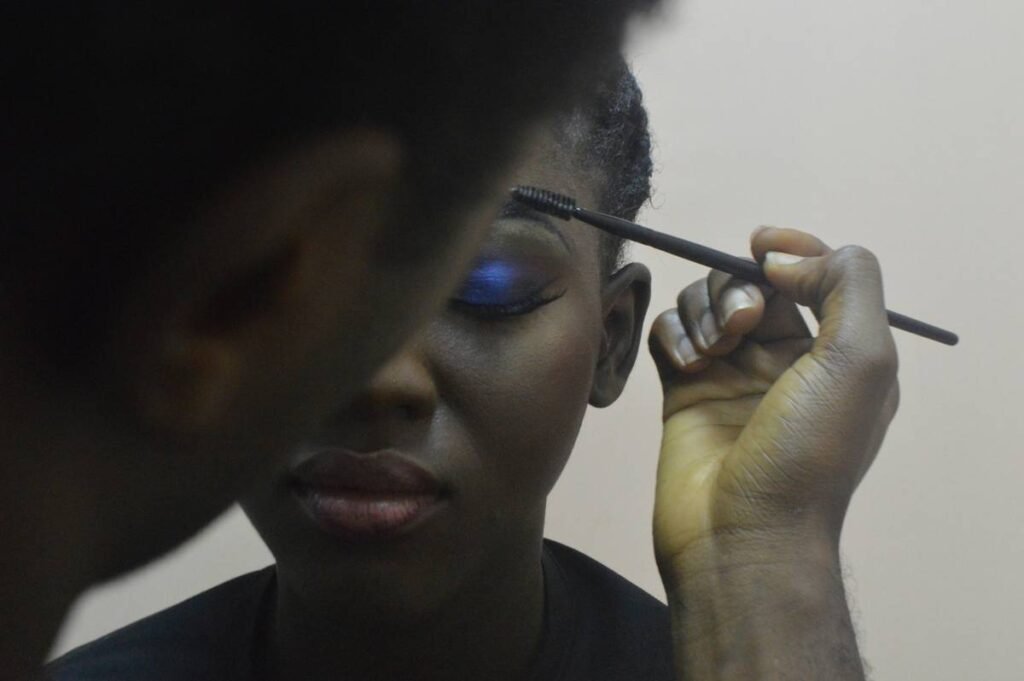
- Paint before applying. Use alcohol-activated palettes (like Skin Tones) on the backside while flat—it’s easier than painting on curved skin.
- Seal edges with liquid latex or gelatin. Creates a gradient, not a hard line.
- Store molds properly. Keep in airtight containers with desiccant—moisture ruins platinum silicone over time.
⚠️ Terrible Tip Alert: “Use hot glue to stick prosthetics.” Nope. It melts skin, traps bacteria, and looks like melted crayon. Just… don’t.
Rant: Why Do People Skip Skin Prep?
Your prosthetic is Picasso-level genius—but if you slap it on oily, unclean skin? It’s sliding off by Act II. Cleanse with 99% isopropyl alcohol. Shave stray hairs. Apply adhesive in thin, even coats. Let it get tacky. This isn’t optional—it’s basic respect for your craft (and your wearer’s comfort).
Real-World Wins: From Indie Film to Broadway
Case Study: “The Hollow Veil” (Indie Horror, 2023)
Budget: $8K total. My team needed 12 identical plague-victim cheek lesions. Using a single master sculpt, we created a multi-cavity silicone mold. Result? 12 consistent prosthetics cast in one session—saving days of reshoots. Wear time: 8+ hours under sweat and rain, thanks to Beta Bond adhesive and proper edge blending.
Broadway’s “Hadestown” – Fates Ensemble
Performer prosthetics require extreme durability (8 shows/week!). Their forehead appliances use Ecoflex 00-30 silicone—softer than Dragon Skin—for natural brow movement. Key insight? They embed nylon mesh during casting for tear resistance without sacrificing flexibility.
FAQs About Casting Prosthetic Makeup
Is casting prosthetic makeup safe for sensitive skin?
Yes—if you use platinum-cure silicones labeled FDA-compliant or ISO 10993-certified. Avoid condensation-cure (tin-based) types—they release irritating byproducts.
How long does a prosthetic last once applied?
With proper adhesive and prep: 8–12 hours for stage, up to 24 for film (with touch-ups). Sweat, oil, and friction are the main enemies.
Can I reuse my mold?
A well-made platinum silicone mold can yield 20–50 casts if cleaned and stored correctly. Never use sharp tools inside—it nicks the surface and transfers defects.
What’s the cheapest way to start?
Begin with alginate life casts and single-use plaster waste molds. Practice sculpting and painting before investing in reusable silicone systems.
Conclusion
Casting prosthetic makeup blends artistry with engineering—and mastering it means respecting both. From choosing medical-grade silicones to venting molds like a pro, every step impacts realism, comfort, and durability. Remember: your goal isn’t just to impress—it’s to disappear. A great prosthetic shouldn’t be noticed; it should be believed.
So go forth. Sculpt boldly. Cast cleanly. And may your seams stay invisible—even under 4K scrutiny.
Like a Tamagotchi, your silicone mold needs daily care… or it dies tragic, bubbly death.
Gelatin ghosts rise,
Silicone dreams never peel—
Stage lights kiss true skin.